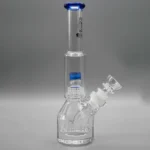
Austin Vape and Smoke is proud to carry glass pieces (pipes and water pipes?) from a number of artists local to Austin. The amazing skill and creativity shown in every piece we display is the result of an artist practicing tirelessly, a dedication that has always been necessary when working with glass.
Today’s popular techniques have built on centuries of glass blowing knowledge. Curious about how these delicate procedures came about, or how people started working with glass to begin with? Read on for a brief history of glass working!
Humans and Glass
Natural glass has always existed, from occurrences like lightning strikes or volcanic eruptions, and it’s thought that stone age humans used pieces of naturally occurring glass as cutting tools. It’s likely that craftsmen in Egypt and Mesopotamia were some of the first to experiment with more advanced, purposefully-shaped glass creations. It must have been somewhere in this time period that people learned to purposefully make glass, possibly accidentally, by melting sand, soda ash, and limestone together at very high temperatures.
It wasn’t until the Roman Empire, however, that glassmaking technology took off. With bustling trade routes spreading throughout the empire, glassmaking technology and techniques spread far and wide, with Cologne, Germany becoming the hub of Roman glassmaking and glass blowing. Cities within the Roman Empire were the first to use glass in architecture for windows, and artists in this time period perfected many skills in the creation of ornate glass.
Nowadays, glass blowing continues to be a popular technique in glassmaking, a technique that requires a patient and careful hand. Below, we’ll lay out the steps a glass blower would take to create a piece of art!
Classic Glass Blowing
* The glassblowing process begins in the crucible- an oven in which the clear glass that a blower begins with is originally melted. To start the process, an artist uses a steel blowing pipe to gather a layer of molten clear glass from the inside of the crucible.
* This glass is then rolled on a steel table to give it a rough cylindrical shape, and must from this point be kept in a constant rolling motion.
* The glass cylinder is brought back and forth during the shaping process to another oven, nicknamed the glory hole, where the glass can be inserted directly into intense heat via a hole in the side. This repeated step keeps the glass at the minimum necessary temperature of 1000 degrees fahrenheit.
* At this point, color can be added! The artist rolls the heated glass over colored powders or bars, picking up more and more color with each roll. Then, the glory hole is used again to heat the colored glass with the clear so the two combine to make one solid piece. Different shades are added and heated, until the desired pattern is complete.
* The glass piece must be continuously rolled and shaped with different tools and repeated trips to the glory hole, then finally the actual blowing begins. A puff at the end of the pipe creates the first bubble, which is heated in the glory hole, another puff to create the shape, and that process is repeated over and over till the glass looks as it should.
* Once the glass piece is shaped exactly how the artist wants, it’s transferred to the final oven, called an annealing oven, which slowly cools the glass piece over 14 hours to room temperature, which prevents cracking or breaking that occurs when glass is cooled too quickly.
* After cooling overnight, the artist can open the annealing oven to find the final product!
The steps above are the basic glass blowing process for larger glass pieces. For smaller glass pieces, like pipes and smaller water pipes, torches can be used in the place of larger ovens.
Glass Blowing a Pipe
* An artist will begin with a small glass tube open on one end, which is heated with a mounted torch until it’s hot enough for color to be added.
* Color is added in one by one, rolled on or placed on in the desired pattern, and then rolled over a small steel piece, essentially a miniaturized version of the process above!
* Once all of the color is on the piece, a small metallic rod is stuck into the closed end of the glass tube that is being heated. Holding the metallic rod in one hand and the unheated end of the glass tube in the other, the artist slowly pulls to create the neck of the pipe.
* Once the neck is stretched to the desired length, the metallic rod is removed and air is blown into the end of the glass to create a bubble that will become the bowl.
* A second metallic rod, roughly the size and shape of a large crayon, is pressed into the bubble to create the bowl shape, and as it’s held in place air is blown into the glass rod again to create the carb.
* The pipe’s shape is essentially formed at this point, final decorations are added now, then the finished pipe is twisted and separated from the open end with a hole added to form the mouthpiece. The pipe is now complete!
These are the steps that form every piece of glass found displayed on the shelves of AVS!
Want to see the incredible artistry in person? Swing by one of our three locations today to be shown some of the best glass Austin has to offer by our awesome staff!
Sources:
http://www.thehouseofglassinc.com/glasshistory.htm
www.britglass.org.uk/about-glass
http://www.sacramentoartglass.com/the-process-of-blowing-glass.html
https://www.youtube.com/watch?v=cpXL0SUyOD4
http://www.bernzomatic.com/content/uploads/2015/06/project_modal_960x360_glass_blowing.jpg


